Create pre-built templates for customized photo products
Last edited on September 14 2023
With an ever growing market for personalized and custom gifts, it’s becoming more and more important to set yourself apart from competitors. You can do so by setting a pricing strategy, focus on niche markets or by offering unique products.
But the one way that is often forgotten - and does not require additional investment- is diversification. Creating unique pre-designed product templates can cause your line of products to grow explosively. Besides this, you can also meet specific customer needs, gain insight into customer data, but most importantly, you create a unique fun experience for the customer while customizing his or her photo product. You help them get started and inspired, increasing the chances of conversion.
With the white-label product customization tools from Instant Design Tool, you’ll be able to apply all of the above. Create a design tool within minutes and you’re instantly ready to start selling customized photo products!
Create unique templates in the Extensive Product Designer
Is your designer equipped with ready-to-sell products? Perfect! The next step is adding unique product templates to help your customer with the designing process.
Note: this tutorial guide only applies for users with the Extensive Product Designer. For stores with the 2D & 3D product customizer, a different method applies.
Your design tool already includes a comprehensive set of free templates to use. But if you really want to stand out from other e-stores, you’d be wise to follow this guide and discover how you can create templates in the Extensive Product Designer. In this tutorial we create a pre-built template for Mother's Day. Ready? Let's start!
1. Log into your Toolmanager panel
2. Select > Themes, on the left side of the menu
3. Select > Create new theme
Select the desired product to enter the themes editor. In this example we choose the Photobook A4 portrait
Use placeholders, shapes, clipart, text and frames
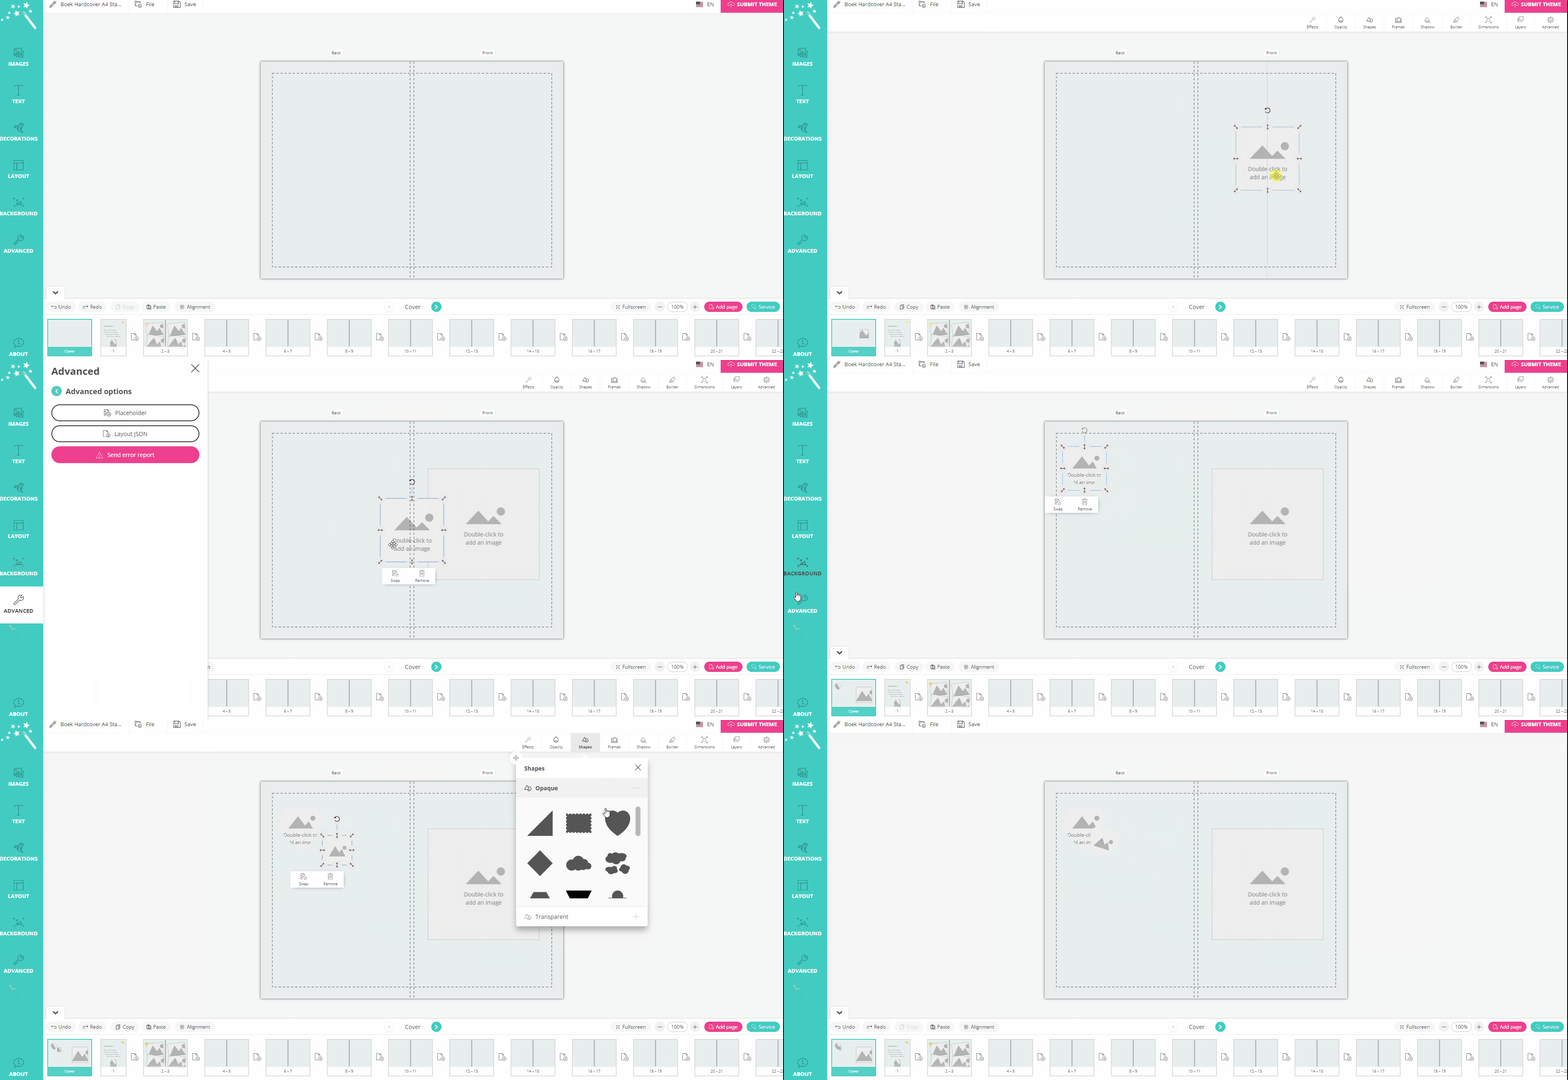
You can start the template design process by starting with the back and the front (cover) of the photobook. Use the ‘’Advanced tool’’ tab to access the placeholder option. With the placeholder button, you can create any photo frame layout you want for your customers.
Add placeholders
Adding placeholders to the photobook template is really easy. The placeholders will make it easy for the customer to add photos to the template that are instantly aigned in the right place.
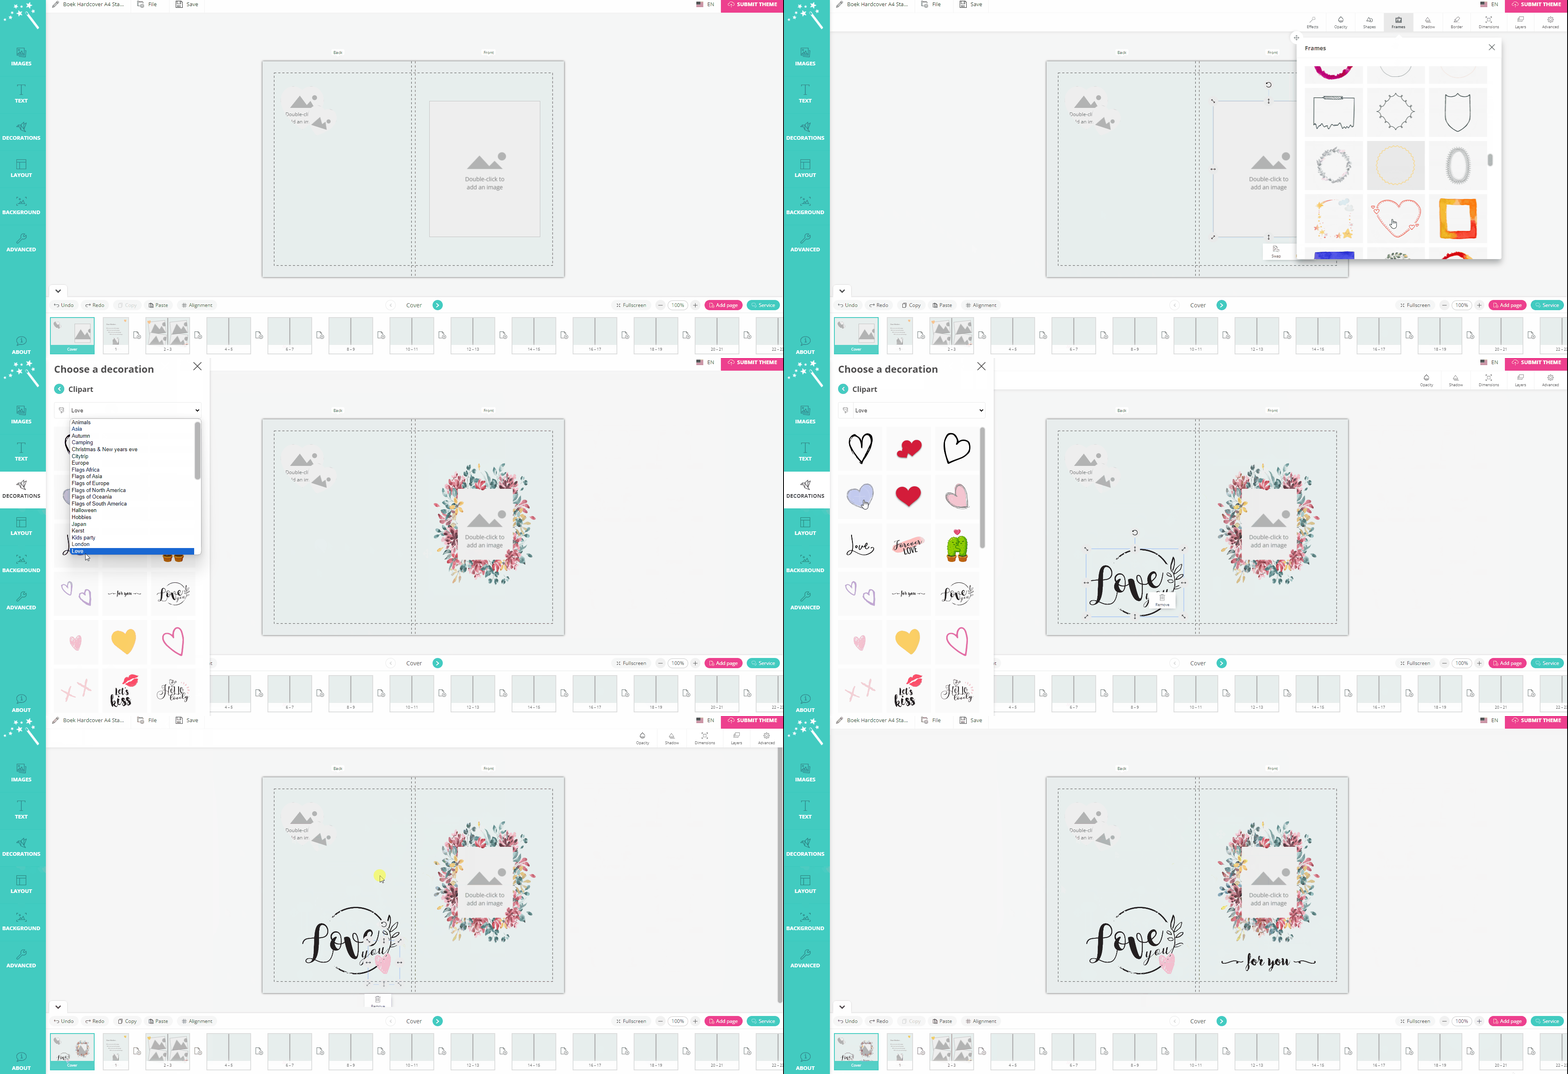
Frames and clipart
Change its shape or add a beautiful frame to the placeholder. Also, choose from the free clipart library and select relevant images to enhance the photobook template.
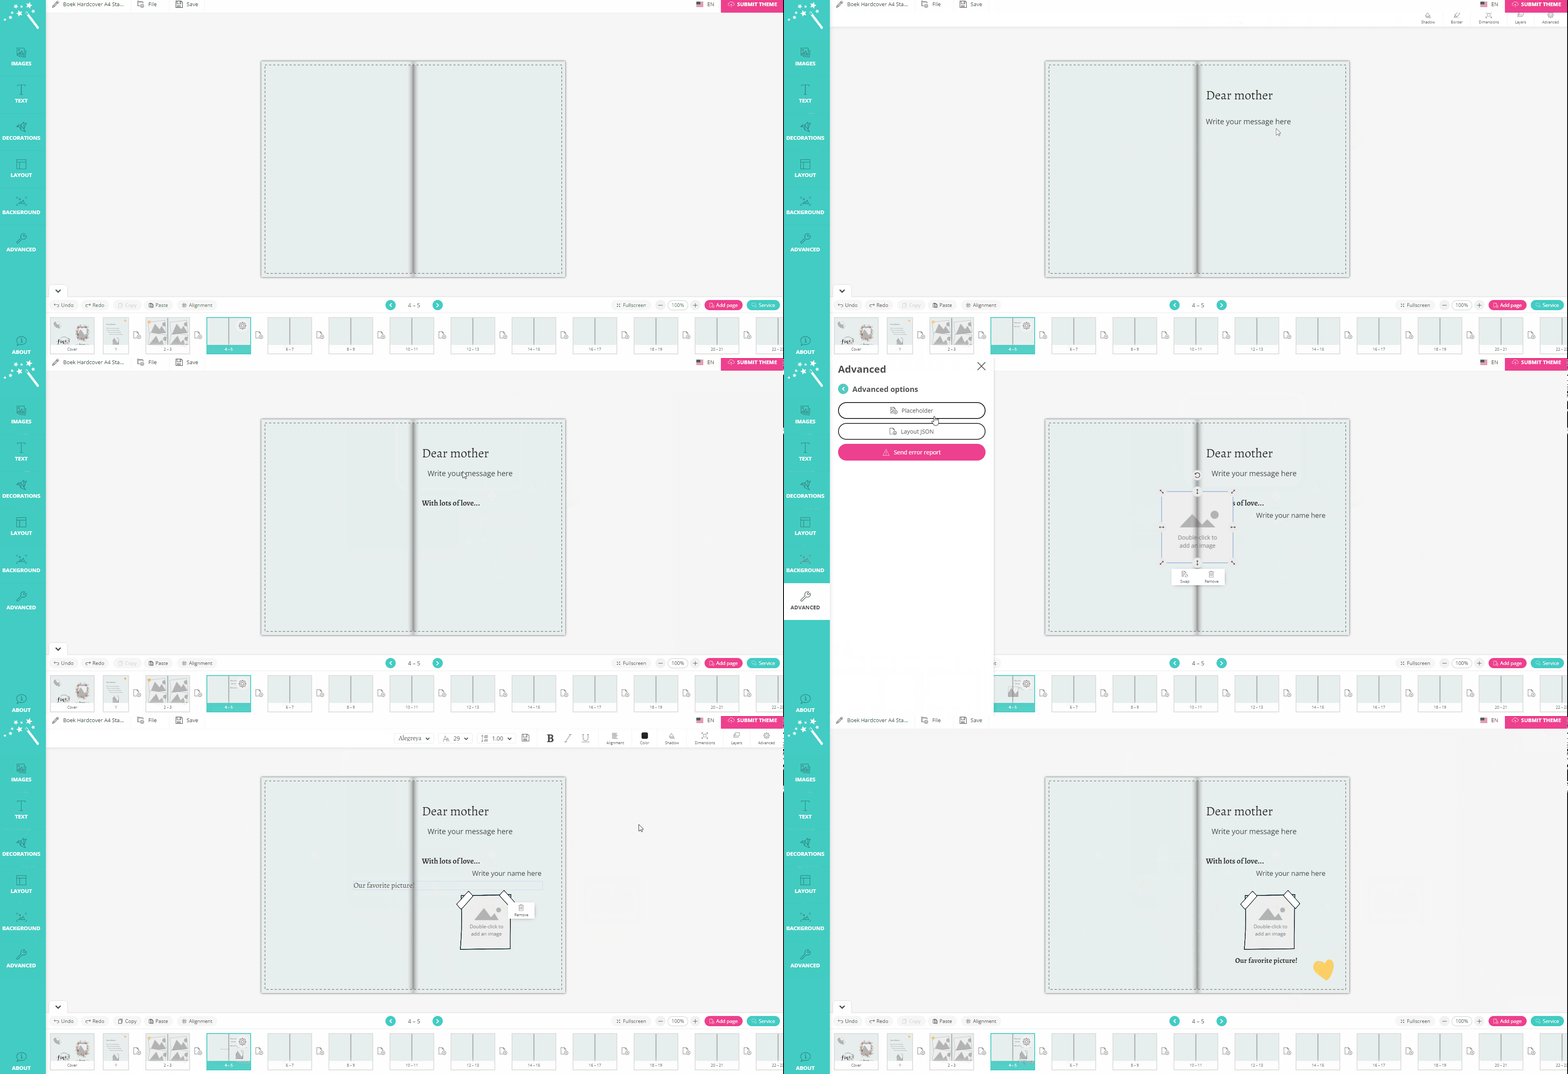
Fixed elements
You can use the text feature to help the user easily write a piece of content on the page. Lock text boxes to prevent text (or photos) from moving around. Create fixed clickable elements in the template using the advanced option.
Create photo layouts
To complete the template, you can add beautiful photo layouts. You can lock these layouts to prevent moving while designing the photo book. You can add fun (standard) clipart to give the layout some extra spark or upload your own custom clipart via the images section by selecting ‘’add as clipart’’
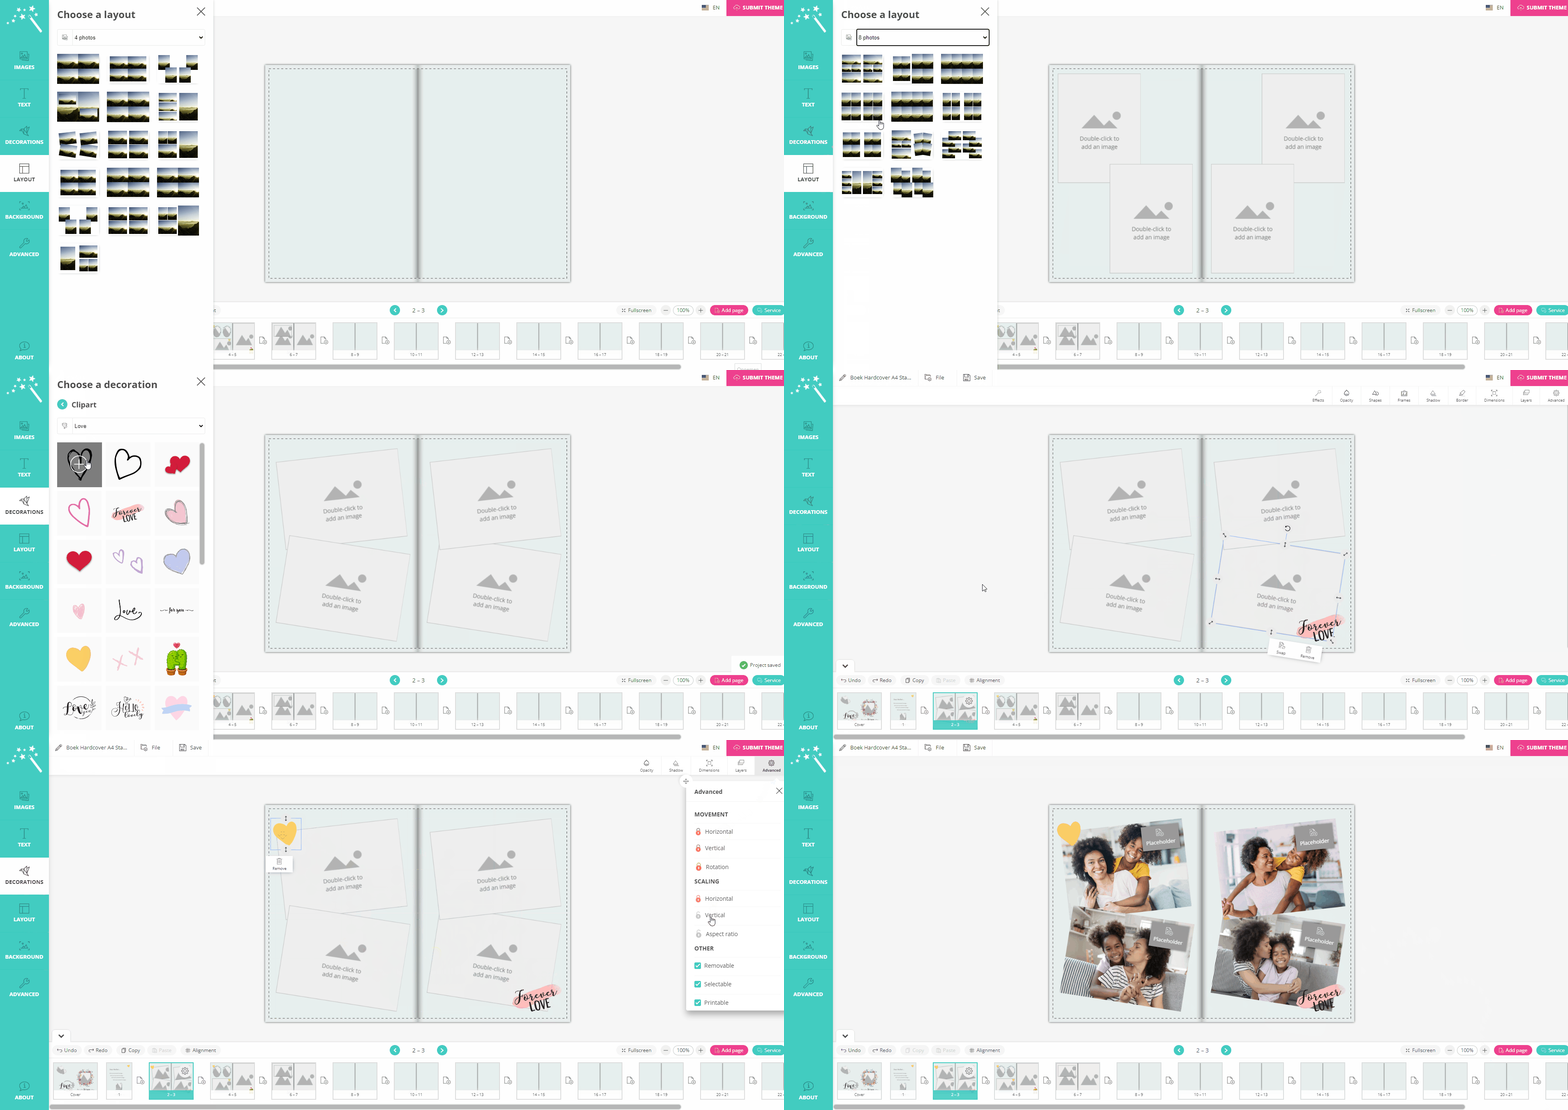
Happy with your design? Hit the ‘’submit theme’’ button and approve your own design. The newly created template will now be activated for your customers to use!
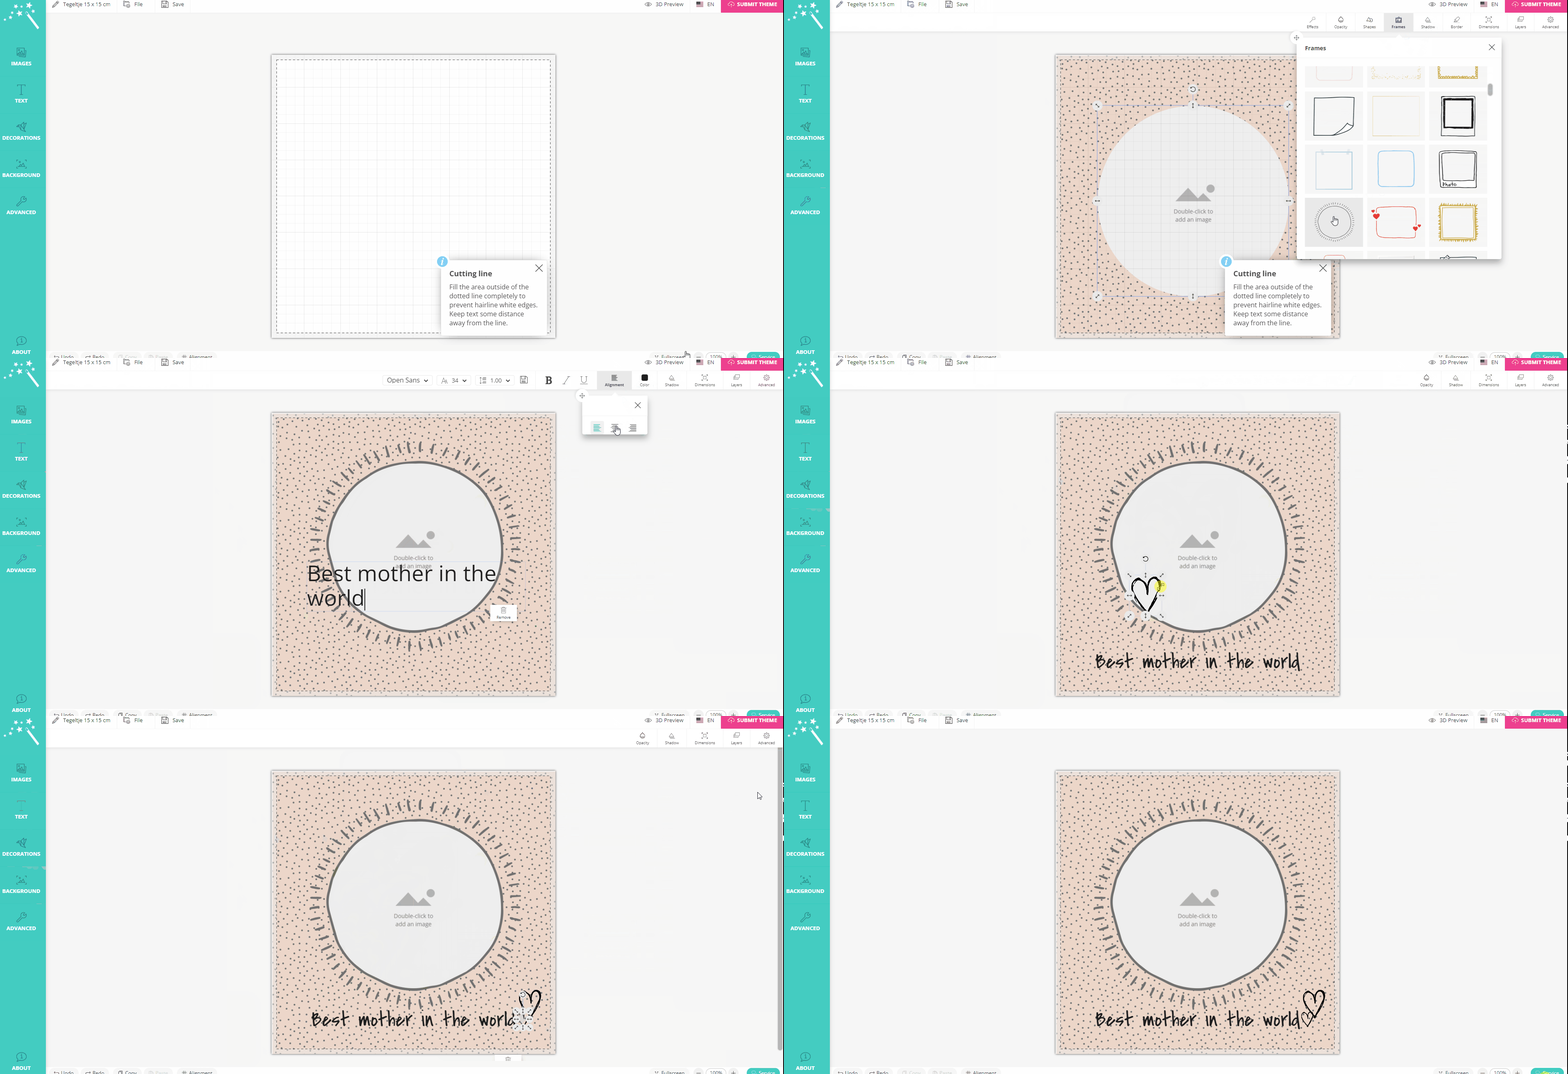
The above mentioned instructions can be applied to all the products from the product catalog. Also, for the popular gift item photo tiles. Watch the example below and see how you can use all the editing options like background, frames, shapes, advanmced and text to a create beautuful template.
Link customer directly to the template
Ready to publish the created template on your website? There are a few ways to incorporate the created template.
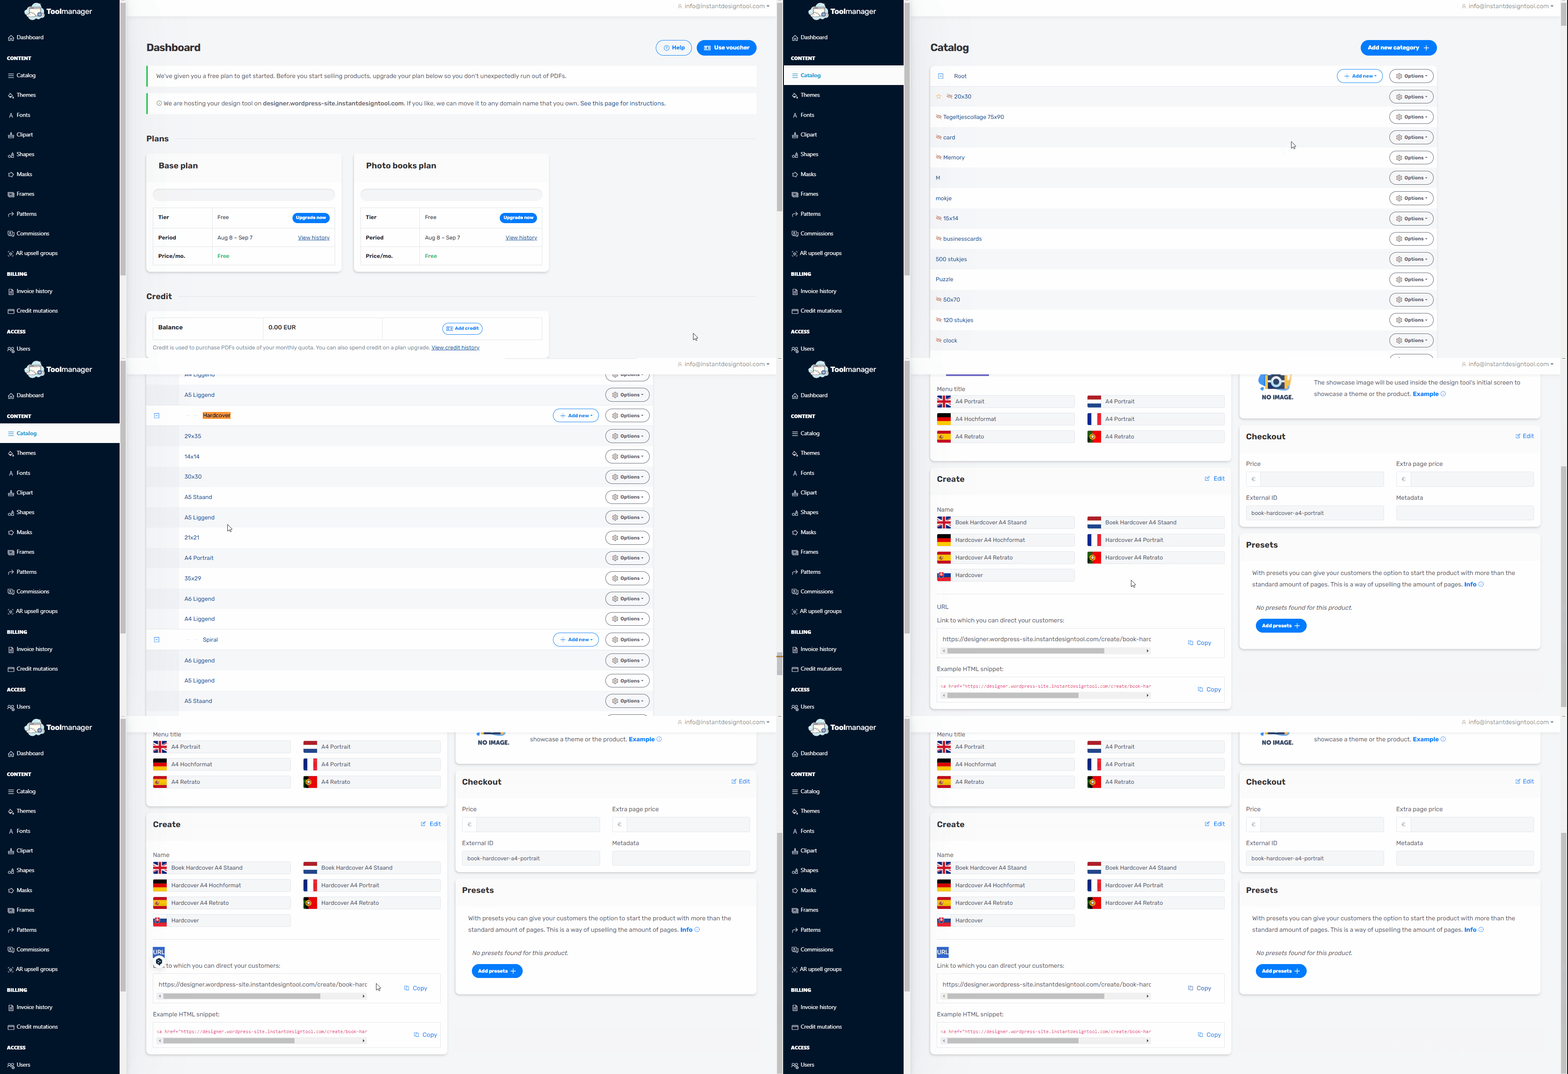
If you’ve created – for example – a targeted landing page for Mother’s Day on your website and you want to convert that traffic and link them to the product template, you can extract the theme url from the Toolmanager
1. Select > Themes
2. Select product from drop-down menu
3. Select the editor button up on the right from the theme/template
4. Hoover down to the > Compatible products menu. Here you find the ‘’Themes URL’’
Add the template to the themes catalog
You can make sure the customer starts the designing process with a blank project. In this case you use the product URL from the Toolmanager.
The customer will now start the designing process with the option to start with a blank project once they’re linked to the tool. They can always choose to select a desired template from the >Themes menu in the design tool later on.
Have fun creating unique templates!
